Stripes and Regrets: My Great DIY Hallway Makeover Mishap
- Rachael Hand

- Apr 30, 2025
- 3 min read
It all started with a fairly reasonable and considered decision, made back in March: I was going to redecorate my hallway. Nothing wild. Just a small refresh, a little zhuzh, a personal project to kickstart spring.
Fast forward to early April and all I can say is I was having deep regrets about it.
The Grand (Monochrome) Plan
The plan was simple enough: repaint the hallway completely white again, including the built-in shelves my dad crafted for the alcove, and then add some bold black stripes for a crisp, modern contrast. I was feeling a monochrome vibe (which seems to be a trend in my life across everything at the minute from my hair to my new trousers!). In my head, this would be stylish, minimal, striking.
Or so I thought.
The hallway had always been white, but years of wear and the great Christmas Command Hook Catastrophe (which left a hole in the ceiling) had taken their toll. The shelves were grey with rainbow-coloured fronts, which now I write it down sounds awful… I don’t think it was?!


So, the pivot to monochrome began. I painted everything white to create a clean, bright blank canvas. The plan was to use black stripes to echo the line of the shelves, wrapping about a third of the way around the walls, framing the space and, most importantly, creating the perfect backdrop for my antique porthole mirror.
Where It All Started to Unravel
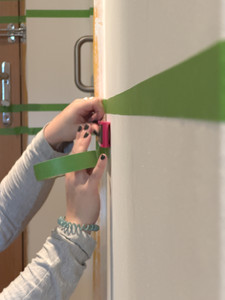
Here’s where the bother started and my DIY hallway makeover woes began. I don’t have a laser level. So I’m working with a spirit level, a plastic ruler and a load of masking tape. And of course, it goes without saying, even in a relatively new build flat, none of the walls are truly straight. So needless to say, getting those stripes marked out was one heck of a chore, but, I am very proud to say, that many hours, several swear words and three rolls of masking tape later, I did it!
At last it was time to add the black stripes.


The Reveal (And the Heartbreak)
I’m not known for a steady hand. In fact, most of the people in my life would probably tell you I’m super clumsy. So I took my time. I painted carefully within the masking tape lines, used three coats to make sure the black was bold and solid, and then stood back, ready for the grand reveal.
And that’s when disaster struck.
As I peeled off the masking tape, for reasons I’ll never understand (and I have Googled this phenomena and got about ten different possible answers, so seriously, I’ll never understand), the black paint came with it, stretching like elastic, peeling clean off the white wall beneath. My beautiful, crisp stripes, ended up torn, ragged, ruined. I was fuming. Hours of work and metres of masking tape, all wasted in a matter of seconds.
The DIY Hallway Makeover Comeback
So I sulked for a couple of hours. Then I had to make a choice: forget the stripes altogether or commit and redo the stripes. Begrudgingly, mainly out of stubbornness, I chose the latter.I said stripes. I was having stripes.
But I made one key change: I simplified. On reflection, wrapping the stripes all the way from the shelves to the bathroom door felt a bit much in such a small space. So the revised plan: striped shelves, and stripes only on the mirror wall. A cleaner, more considered look.
I won’t bore you with another run down on painting everything back white, AGAIN, and masking out all the stripes, AGAIN, and painting the black stripes AGAIN. But I will share the tricks I used the second time around because they worked.

Lessons Learned (So You Don’t Have to Suffer Like I Did)
Remove masking tape while the paint is still wet.
I don’t care what the internet says, this made all the difference. It gave me clean, sharp lines without the dreaded elastic paint peel.
Use thinner coats of paint.
Especially with darker colours. My first attempt was thick, slow-drying, and more prone to peeling. Thin and buildable is definitely the way to go.
Don’t overdo it.
What seemed like a dramatic design choice in my head actually felt overpowering in real life. Editing it down made the finished look feel more intentional, and far more elegant (which isn’t a word typically associated with me so that’s a bonus).
Accept your walls will betray you.
New build, old build, don’t care, walls aren’t straight. Work with it. Embrace the imperfections (or disguise them with clever paintwork and strategically placed mirrors 😉).
The Final Look
Despite the peeling paint pain, wasted masking tape and days of decorating upheaval, I made it through. Here’s how my hallway is looking now, I am pleased to say, WITH stripes! What do you think?


